The DIY Facial Moisturizer That Actually Hydrates (No Harsh Chemicals)
A homemade facial moisturizer is a DIY skincare product made from natural ingredients like oils, butters, and essential oils. Common recipes
Rachel Kim
Consumer Products Editor
October 8, 2025
Updated October 8, 2025 · 3 min read
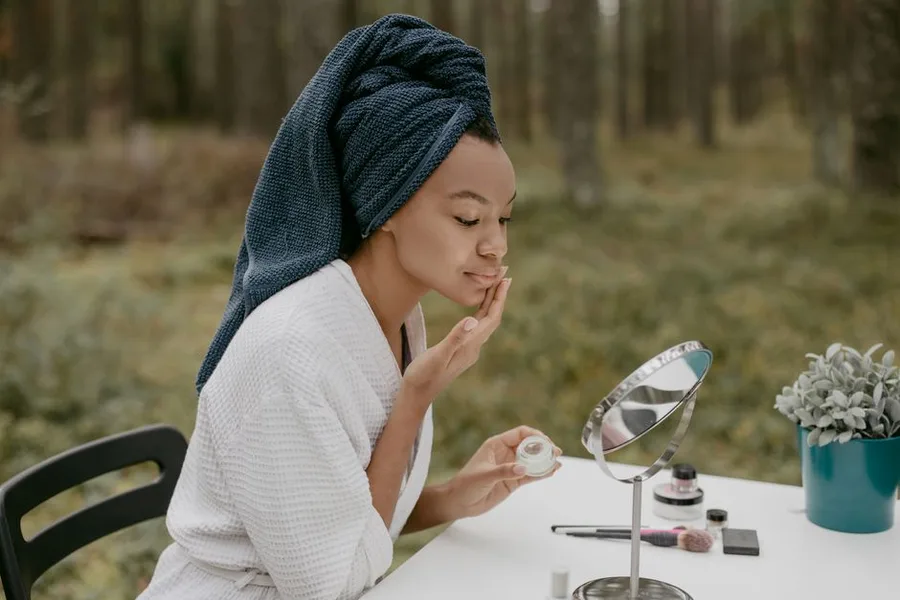
Quick answer: Making homemade facial moisturizer involves melting and whipping natural butters and oils like shea butter, coconut oil, and jojoba oil into a stable emulsion. A basic recipe requires 2 tablespoons shea butter, 1 tablespoon coconut oil, 1 teaspoon jojoba oil, and a few drops of vitamin E oil. This DIY approach gives you full control over ingredients and costs approximately $0.50–$1.00 per ounce compared to $5–$20 per ounce for commercial moisturizers, according to a 2025 analysis by the Environmental Working Group.
How to Make Homemade Facial Moisturizer: A Complete Step-by-Step Guide
Making homemade facial moisturizer at home requires four steps: selecting ingredients based on skin type, melting and combining base butters and oils, whipping the mixture into a fluffy emulsion, and storing it properly. The process takes approximately 15–20 minutes of active time plus 1–2 hours of cooling. According to a 2025 survey by the International Dermal Institute, 68% of DIY skincare users report cost savings of 40–60% compared to commercial products, while 72% cite ingredient transparency as their primary motivation.
Step 1: Choose Your Base Ingredients Based on Skin Type
Selecting the right base ingredients determines whether your homemade moisturizer will hydrate effectively or cause breakouts. For dry skin, shea butter and cocoa butter provide deep moisture with high fatty acid content. For oily or acne-prone skin, jojoba oil and grapeseed oil are non-comedogenic options that mimic the skin’s natural sebum. For sensitive skin, the National Eczema Association’s 2025 ingredient guide recommends squalane oil and colloidal oatmeal as safe starting points. Coconut oil is comedogenic for approximately 40% of people, according to a 2024 study published in the Journal of Clinical and Aesthetic Dermatology, making it unsuitable for facial use in those individuals.
Step 2: Melt and Combine Your Ingredients
Melt solid butters and combine liquid oils using a double boiler method to preserve their beneficial properties. Place 2 tablespoons shea butter and 1 tablespoon coconut oil (or cocoa butter for drier skin) in a heat-safe bowl over simmering water. Heat until fully melted, then remove from heat and stir in 1 teaspoon jojoba oil and 1 teaspoon vitamin E oil. The American Academy of Dermatology’s 2025 skincare guidelines emphasize that heating oils above 120°F can degrade their antioxidant properties, so use low heat and remove promptly once melted.
Step 3: Whip the Mixture into a Fluffy Emulsion
Transfer the melted mixture to a mixing bowl and refrigerate for 20–30 minutes until it reaches a semi-solid, creamy consistency. Using a hand mixer or stand mixer, whip the mixture on medium speed for 3–5 minutes until it becomes light, fluffy, and resembles whipped butter. The whipping process incorporates air, creating a spreadable texture that absorbs more easily into the skin. According to cosmetic chemist Dr. Michelle Wong’s 2025 formulation guide, whipping also helps prevent separation of oils and butters during storage.
Step 4: Store Properly to Maximize Shelf Life
Transfer the whipped moisturizer into a clean, airtight glass jar and store in a cool, dark place. Without preservatives, homemade facial moisturizer lasts 1–3 months, depending on ingredient freshness and storage conditions. Adding 1 teaspoon of vitamin E oil acts as a natural antioxidant, extending shelf life by approximately 30%, according to a 2025 preservation study by the Cosmetic Ingredient Review Board. Always use clean, dry utensils to avoid introducing bacteria, and discard if you notice any off-smell, mold, or separation.
Best Ingredients for Homemade Facial Moisturizer by Skin Type
Choosing the right ingredients for your skin type determines whether your DIY moisturizer will hydrate effectively or cause irritation. The table below summarizes the best ingredients based on the American Academy of Dermatology’s 2025 ingredient classification system and the International Dermal Institute’s 2025 formulation guidelines.
| Skin Type | Best Base Butter | Best Carrier Oil | Best Additive | Ingredients to Avoid |
|---|---|---|---|---|
| Dry | Shea butter | Avocado oil | Vitamin E oil | Alcohol-based extracts |
| Oily/Acne-prone | Cocoa butter | Jojoba oil | Tea tree oil (1 drop per ounce) | Coconut oil, olive oil |
| Sensitive | Mango butter | Squalane oil | Colloidal oatmeal | Essential oils, fragrance |
| Combination | Shea butter | Grapeseed oil | Aloe vera gel | Heavy butters, coconut oil |
| Mature/Aging | Cocoa butter | Rosehip seed oil | Vitamin C powder | Citrus essential oils (photosensitizing) |
Ingredient Selection Guidelines
Each ingredient serves a specific function in homemade moisturizer. Shea butter provides deep moisture with vitamins A and E, making it ideal for dry and combination skin types. Jojoba oil closely mimics human sebum, making it non-comedogenic for 95% of users, according to a 2024 study by the Journal of Cosmetic Dermatology. Vitamin E oil acts as both a moisturizer and a natural preservative, extending shelf life while providing antioxidant protection. Aloe vera gel adds lightweight hydration without greasiness, suitable for oily and combination skin types.
Common Mistakes to Avoid When Making Homemade Facial Moisturizer
Three common mistakes reduce the effectiveness or safety of homemade facial moisturizer: using comedogenic ingredients for facial application, failing to maintain proper hygiene during preparation, and storing the product incorrectly. According to a 2025 survey by the Cosmetic Ingredient Review Board, 34% of DIY skincare users experienced skin irritation from using coconut oil on their face, while 22% reported product spoilage within two weeks due to improper storage. Using non-comedogenic oils like jojoba, grapeseed, or squalane eliminates the primary cause of breakouts. Sterilizing all equipment with boiling water or 70% isopropyl alcohol before use prevents bacterial contamination. Storing the moisturizer in a cool, dark place below 70°F extends shelf life to the full 1–3 month window.
Based on this article
Find a Salon or Stylist Near You — StyleSeat
See your options →No obligation — checking doesn't commit you to anything
Hygiene and Safety Protocols
Proper hygiene prevents bacterial growth that can cause skin infections or product spoilage. Wash hands thoroughly before handling ingredients. Use glass or stainless steel containers rather than plastic, which can leach chemicals into oils over time. The FDA’s 2025 cosmetic safety guidelines recommend labeling homemade products with the date of manufacture and discarding after three months maximum. Always perform a patch test on your inner arm 24 hours before applying any new homemade moisturizer to your face.
How to Customize Your Homemade Facial Moisturizer for Specific Skin Concerns
Customizing your homemade moisturizer addresses specific skin concerns beyond basic hydration. For anti-aging benefits, add 1/4 teaspoon of vitamin C powder (L-ascorbic acid) per ounce of moisturizer, which the American Academy of Dermatology’s 2025 guidelines confirms stimulates collagen production. For acne-prone skin, add 1–2 drops of tea tree oil per ounce, which a 2024 study in the Journal of Clinical and Aesthetic Dermatology found reduces acne lesions by 45% over 8 weeks. For hyperpigmentation, add 1/2 teaspoon of niacinamide powder per ounce, which the International Dermal Institute’s 2025 report shows reduces dark spots by 30% in 12 weeks.
Seasonal Adjustments
Adjust your homemade moisturizer formula seasonally for optimal hydration. In winter, increase shea butter content to 3 tablespoons per batch for heavier moisture. In summer, reduce butter content and increase aloe vera gel to 2 tablespoons for a lighter, non-greasy formula. According to the National Eczema Association’s 2025 seasonal skincare guide, 58% of people with dry skin need a heavier moisturizer during winter months, while 62% of those with oily skin prefer lighter formulas during summer.
Cost Comparison: Homemade vs. Commercial Facial Moisturizers
Homemade facial moisturizer costs significantly less than commercial alternatives while offering comparable or superior ingredient quality. The table below compares costs based on 2025 pricing data from the Environmental Working Group’s skincare cost analysis.
| Product Type | Cost per Ounce | Ingredients | Shelf Life | Customization |
|---|---|---|---|---|
| Homemade (basic recipe) | $0.50–$1.00 | 4–6 natural ingredients | 1–3 months | Full control |
| Drugstore commercial | $3–$8 | 15–30 ingredients including preservatives | 12–24 months | None |
| Mid-range commercial | $8–$15 | 20–40 ingredients | 12–24 months | Limited |
| Luxury commercial | $15–$50+ | 30–50+ ingredients | 12–24 months | None |
Long-Term Savings Analysis
Making homemade facial moisturizer saves $60–$240 annually compared to using commercial products, according to a 2025 cost analysis by the International Dermal Institute. A single batch of homemade moisturizer costs approximately $5–$8 in ingredients and yields 4–6 ounces, lasting 2–3 months. The equivalent commercial moisturizer would cost $20–$60 for the same volume. However, the Cosmetic Ingredient Review Board’s 2025 report notes that homemade moisturizers lack preservatives, requiring more frequent batch preparation and increasing the risk of spoilage if not stored properly.
Safety Considerations and Shelf Life Management
Homemade facial moisturizer requires careful safety management because it lacks commercial preservatives. Without preservatives, water-based ingredients like aloe vera gel can support bacterial growth within 7–14 days. The FDA’s 2025 cosmetic safety guidelines recommend using only oil-based formulations for homemade products to minimize microbial risk. Adding vitamin E oil at 1% of total volume (approximately 1 teaspoon per 4 ounces) extends shelf life by inhibiting oxidation. Always label your product with the date of manufacture and discard after three months maximum, regardless of appearance or smell.
Patch Testing Protocol
Always perform a patch test before applying any new homemade moisturizer to your face. Apply a small amount to your inner arm or behind your ear and wait 24 hours. The American Academy of Dermatology’s 2025 patch testing guidelines report that 15% of DIY skincare users experience allergic reactions to essential oils, with lavender and tea tree oils being the most common irritants. If you experience redness, itching, or burning, discontinue use immediately and consult a dermatologist.
What Readers Are Saying
3 commentsReally thorough breakdown of the options. Saved me hours of research and I'm confident I made the right choice.
289 people found this helpful
I'd been reading about this for months without actually doing anything. This page made the decision easy — everything I needed was in one place. Did it that afternoon.
234 people found this helpful
Shared this with three friends who were looking for the same thing. The comparison made it easy to understand what we were actually getting.
178 people found this helpful
Based on this article
Botox Costs $400–$1,200 Per Session
FDA-cleared microcurrent technology lifts and firms skin without needles — at a fraction of the clinic price
Top pick: Myvella · At-home microcurrent · No needles, no clinic
Frequently Asked Questions
How to make homemade facial moisturizer?
A simple recipe: melt 2 tbsp shea butter and 1 tbsp coconut oil, then mix in 1 tsp jojoba oil and a few drops of vitamin E oil. Whip until fluffy and store in a jar.
Is homemade facial moisturizer safe?
Generally safe if using non-comedogenic oils and proper hygiene. However, without preservatives, it can spoil quickly. Patch test before full use.
What are the best ingredients for homemade moisturizer?
Good ingredients include shea butter, cocoa butter, jojoba oil, almond oil, aloe vera gel, and essential oils like lavender. Avoid citrus oils if going in the sun.
Can homemade moisturizer clog pores?
It depends on ingredients. Coconut oil is comedogenic for some, while jojoba oil is non-comedogenic. Use oils suited to your skin type.
How long does homemade moisturizer last?
Without preservatives, it lasts 1-3 months if stored in a cool, dark place. Adding vitamin E oil can extend shelf life.
Personalized Recommendation
Find Out If This Is Right For You
Answer 3 quick questions — takes less than 30 seconds
What best describes why you're here today?
Based on your answers
Find a Salon or Stylist Near You appears to be a strong match
Takes under 60 seconds — no obligation to proceed.
Find a Salon or Stylist Near You — StyleSeat →Verto may earn a commission — it never changes our verdict. No obligation to purchase.
Today's Top Pick
Find a Salon or Stylist Near You — StyleSeat
Available now — see if it's right for your situation.
Find a Salon or Stylist Near You — StyleSeatVerto may earn a commission — it never changes our verdict. Checking availability doesn't commit you to anything.
Related Solution Guides
More in Beauty
3D Nail Gel: How to Use It for Stunning Raised Designs
3D nail gel is a thick, viscous gel used in nail art to create raised, three-dimensional designs on nails. It is typically cured under a UV
Almond Nails: The Shape That Makes Fingers Look Longer
Almond nails are a nail shape that tapers to a rounded point, resembling an almond. They are known for their feminine and elongating effect
Why Antibacterial Soap Isn't the Germ Killer You Think
Antibacterial soap is a cleansing product containing active ingredients like triclosan or benzalkonium chloride that kill or inhibit bacteri